Video Lighting - Part One

Serious video makers will always consider light prior to and during recording. There are only two options available; the light that god provides and/or artificial light that you provide. Both have their pros and cons and both need technical and creative elements of planning and understanding. I’m a big fan of natural light, especially when I’m on a sunbed next to the pool, but for now I will concentrate mainly on creating your own light using lamps.
Shooting video with DSLR cameras has changed our approach to lighting because of their unique ability to record in low light conditions with little noise and high ISO settings (up to ISO 1600). The different types of lighting equipment now available has also had a similar effect.
What’s the difference?
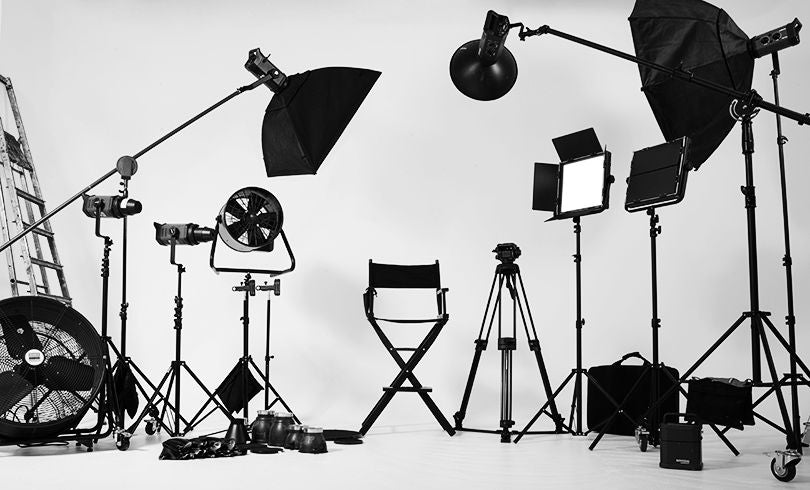
Lighting equipment has come a long way in recent years. The last ten years has seen the demise of the more traditional lamps such as redheads and blondes and a welcome move toward CFL and a plethora of LED lamps.
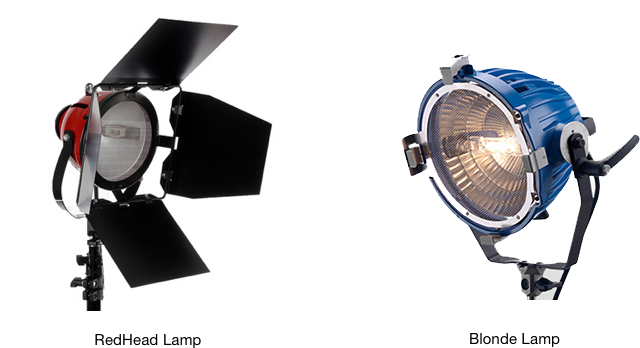
Redheads and Blondes are portable, bulky, very hot to touch and their delicate tungsten halogen bulbs are power hungry, running at 800w and 2000w respectively which would inevitably trip your domestic mains supply, if not take out the entire street! They pack a lot of light with some control and will add fire, burns and molten glass to your risk assessment.They do, however, provide a lot of light, offer good colour and are reasonably priced.
CFL (compact fluorescent lamp) bulbs and tubes have good lumens output, are cool to touch and are dimmable via switching bulbs on or off. They are a low cost lighting option with a variety
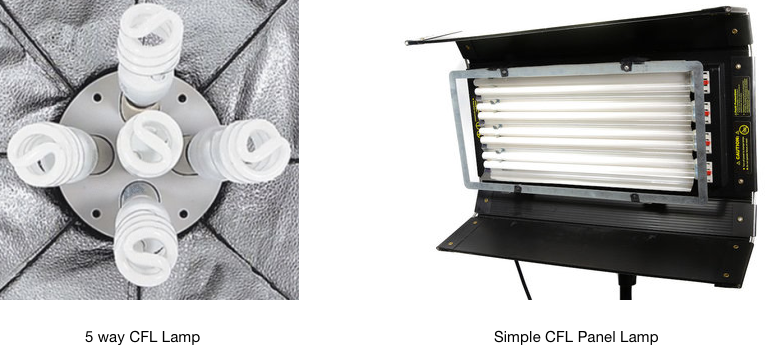
of different types of bulbs available. They do, however, produce green, blue and yellow spikes, offer no real spot control, are prone to flicker and can be difficult to move around and set up
depending how much you spend on them. The bulbs are fragile and can break quite easily especially when transporting them, making them, perhaps, best for studio use.
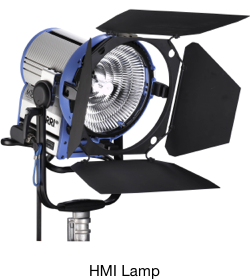
HMI lamps or Hydrargyrum Medium-arc Iodide were originally manufactured for use in the film industry. They offer a very high light output, don’t run as hot as tungsten and have longer bulb life. They require warm up and cool down time and are quite bulky. More recent models have improved their potential use for the DSLR market.
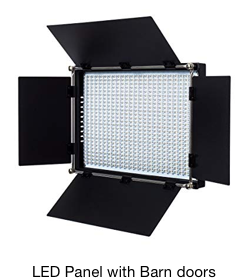
LED lamps are portable and easy to set up. They come both as panels and as more traditional lamps, use very little power, can be run via mains or battery, are cool, have ok colour and are fully dimmable. The bulbs are also long lasting (50,000 hours), robust and flicker free. The cheaper lamps may produce colour spiking and there’s limited spotting. Costs vary, but you probably pay for what you get with these lamps. Flexible LED panels are now also available or you can even make your own panels if you like that sort of thing.
For those of you who are particularly nerdy about your lights I would thoroughly recommend that you view the incredibly in depth LED lamps review conducted by Timur Civan:
www.nofilmschool.com/2016/04/led-lights-comparison-review-color-shootout
When to use lighting?
For me, the answer is whenever and wherever you need to. There are many times when natural light is all you need or indeed, all that is available to you. You can of course bounce natural light around using reflectors close to your subject, thus making max use of the available light.
Your decision on using lamps may be a stylistic one, but in so many cases creating a lighting design plan will improve the quality of your work. By plan, I mean that you need to know how you want the subject lit and why ….hard light or soft light. Side light or flat light. It’s worth remembering that once you have introduced lighting into your video, you will need to maintain a continuity of lighting throughout and those of you who have tried to cut together lit and unlit shots will fully understand why this is important!
Studio and interior lighting: This is when light is at its most controllable and any of the lamps above can be used so long as you are able to access mains supply (many of the LEDs will run on battery). You will also need to control the existing lights within the room and the light coming into the room via windows in order to create a consistent lighting state that you can build from. Typically you may be recording interviews, vlogs, demos, testimonials, endorsements or a video podcast……….all of these will require appropriate lighting. There are three main set-ups to consider:
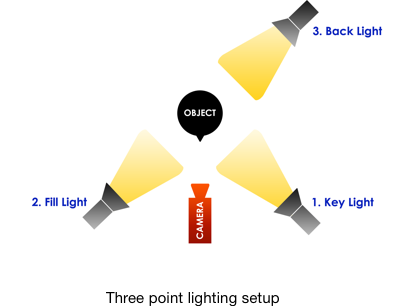
- single-point lighting uses one key light which represents your only light source. It is frequently set at 45 degrees to the camera and set reasonably high. It is often a hard light and gives shape and form to your subject.
- two-point lighting uses one key light and one fill light which is usually softer and not as bright as the key light.It should balance the key light and reduce sharp shadows.
- three-point lighting uses a key, a fill and a backlight. As its name implies, it is placed behind the subject.
Note: You will need to design your set up according to what you wish to achieve in terms of style and client or end user. Three point lighting is simply a key technique for lighting-there are others.
Location lighting: It is unlikely that you will have access to the types of lamps used in the film industry (knowns as HMI’s) which provide controllable daylight for exterior location recording. Wide shots need big, powerful lamps, however mid shots and closeups can be covered using LED lamps running on battery, set to match daylight colour temperature. Recording on the go eg interviews and vox pops may benefit from the use of a battery run ring light or a small portable panel LED. Conducting location interviews, in an office or boardroom, again requires planning so that your lighting setup not only successfully illuminates your interviewee but does a good job of lighting the background, creating depth of field, visual interest and colour.